Train-your-own Extraction Model#
Train-your-own Extraction Model lets you build a fully specialised extraction model for your specific documents. You define the entities you want to extract, annotate a set of documents, and train the model — the result is a model that is tuned exactly to your templates and typically delivers the highest accuracy when your documents follow consistent layouts.
When to use this workflow#
- Use Train-your-own Extraction Model when your documents follow consistent layouts, you can produce labelled examples, and you want full control over a specialised model.
- Use GenAI Extraction instead when you want minimal setup (no annotation required), or when your documents vary too much for a single trained model. GenAI Extraction also supports optional training if you decide to invest in annotation later.
- Use Fine-tune Invoice Extraction instead if your documents are invoices.
At a glance#
| Output | extractions, ocr |
| Annotation | Required |
| Training | Required |
| Returns confidence per field | Yes |
| Cost | 80 credits/page · 120 credits/document |
Creating the workflow#
You can start the workflow creation either by clicking Train Your Own Model + on the API Hub, then Create Custom Extraction, and finally selecting Classic Extraction. Alternatively, open the wizard directly.


The wizard guides you through the following steps:
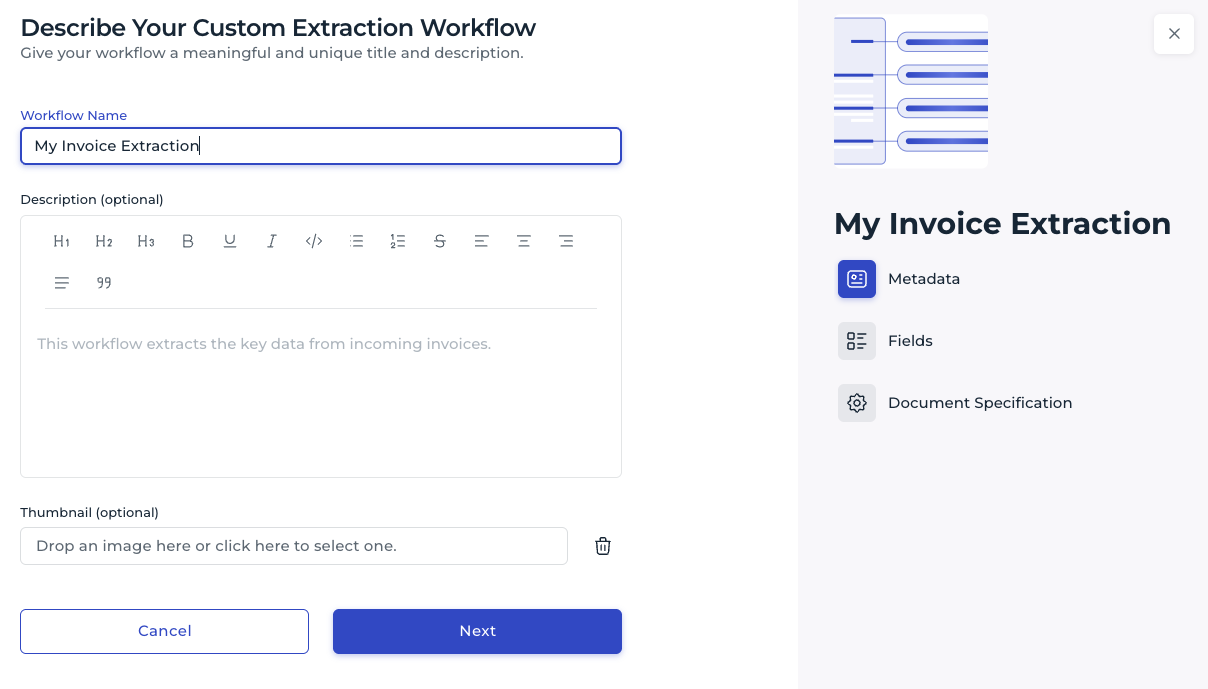
- Workflow metadata. Give your workflow a name and optionally a description and thumbnail.
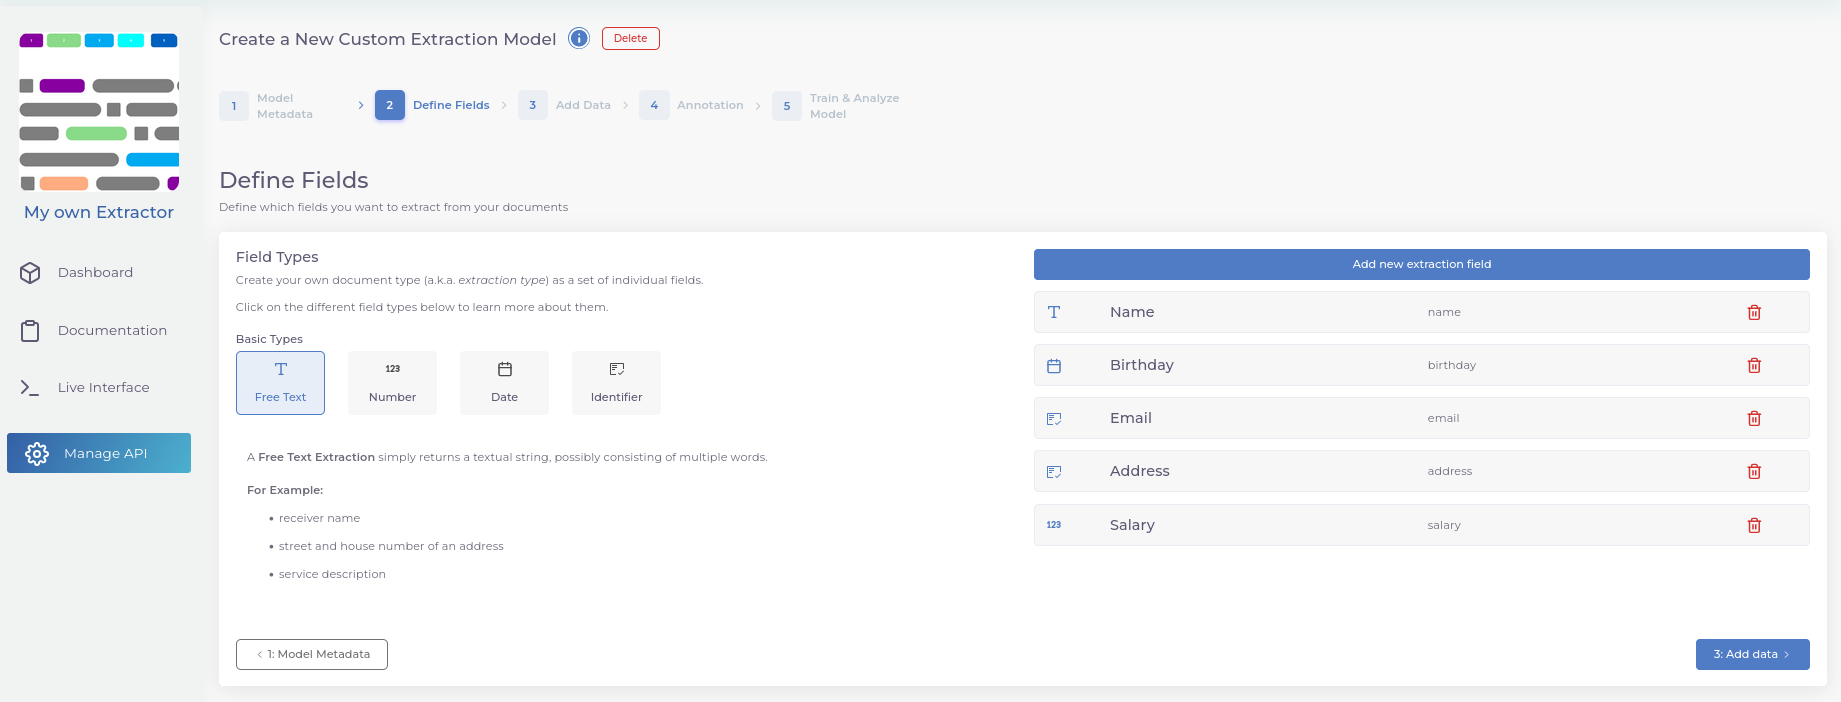
- Define the entities you want to extract from your documents.
-
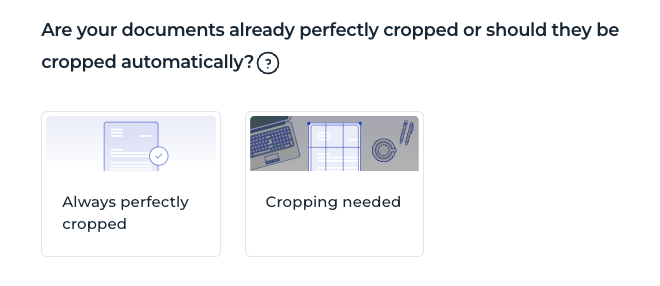
Document specification. Tell us more about your documents so we can better steer the model training process. Some options are pre-selected; you may change them according to your needs.
Cropping. When documents are photographed, or multiple small documents are scanned to A4, the files often contain unwanted background around the document. Cropping removes those outer areas and renders each scanned document individually — which can drastically improve your workflow's quality. For digitally born documents, cropping is usually not necessary.
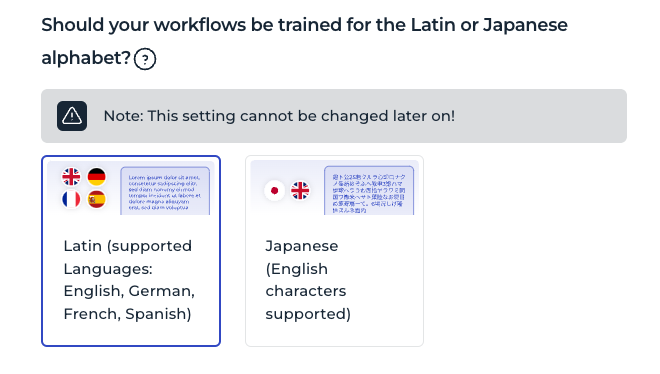
Character set. Pick Latin for English, German, French, Spanish, Slovak, Czech, Polish, Italian, Dutch, Slovenian, Croatian, Portuguese, Finnish, Swedish, Danish, and Norwegian. If your documents contain Japanese characters, pick the Japanese option for best results.
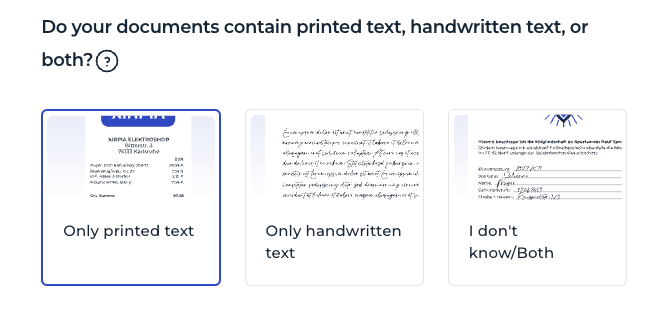
Printed and handwritten text. Choose "only printed text" to ignore handwritten text in your documents. Choose "only handwritten text" to ignore printed text. Use the combined option to consider both.
-
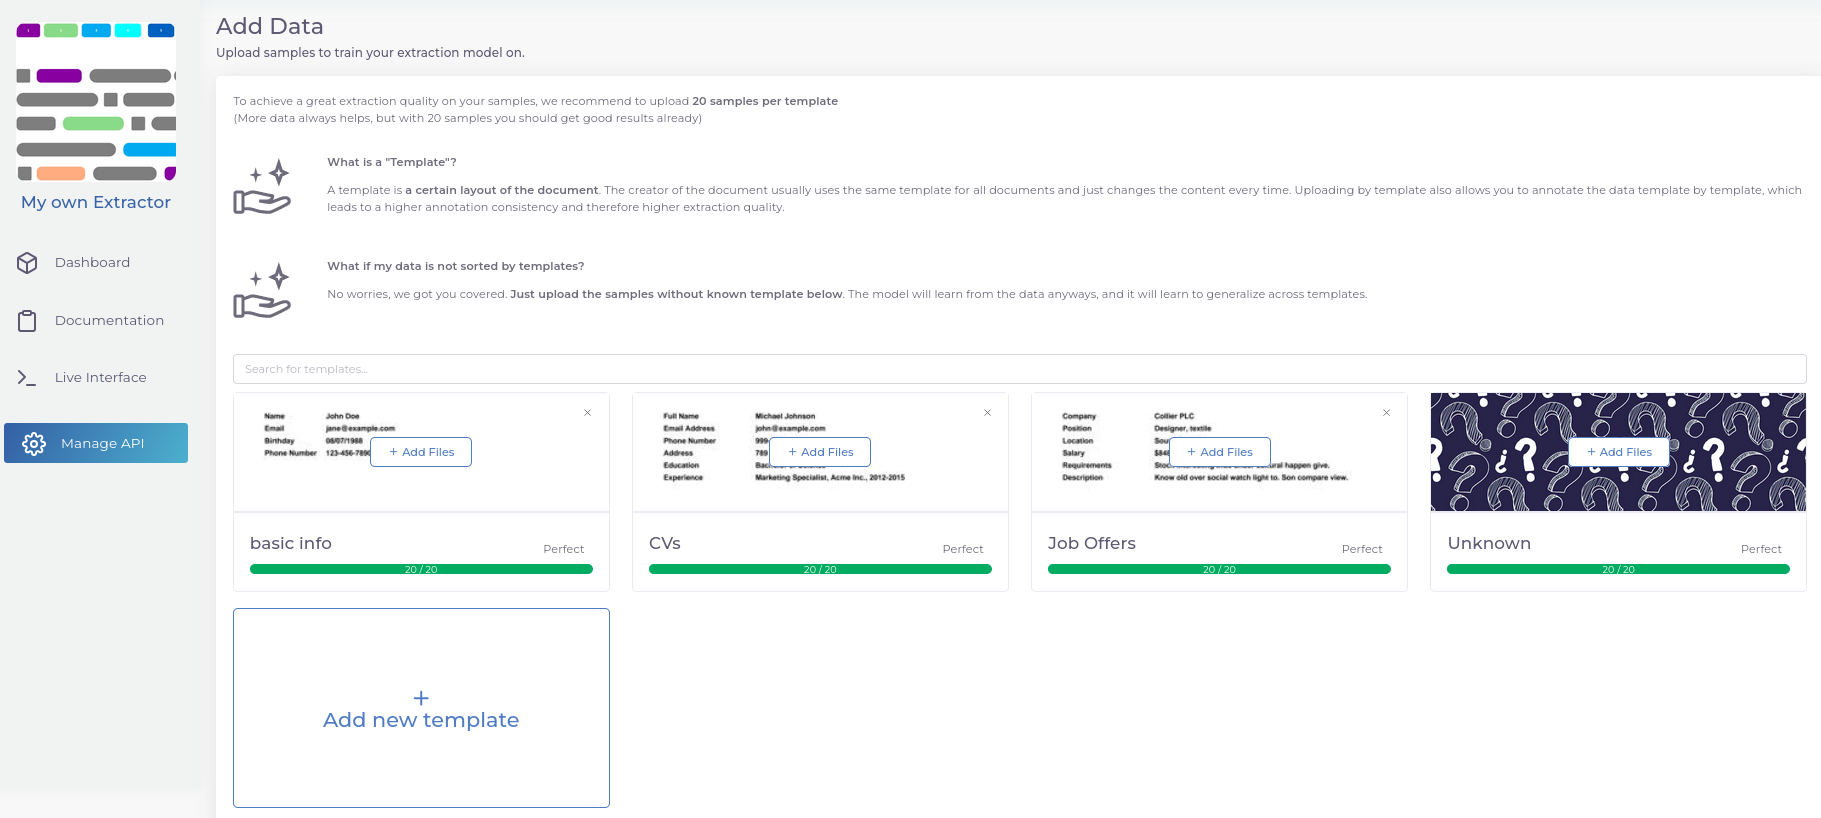
Upload your documents. You can specify individual templates, or just upload all your documents in one place if they don't follow specific templates.
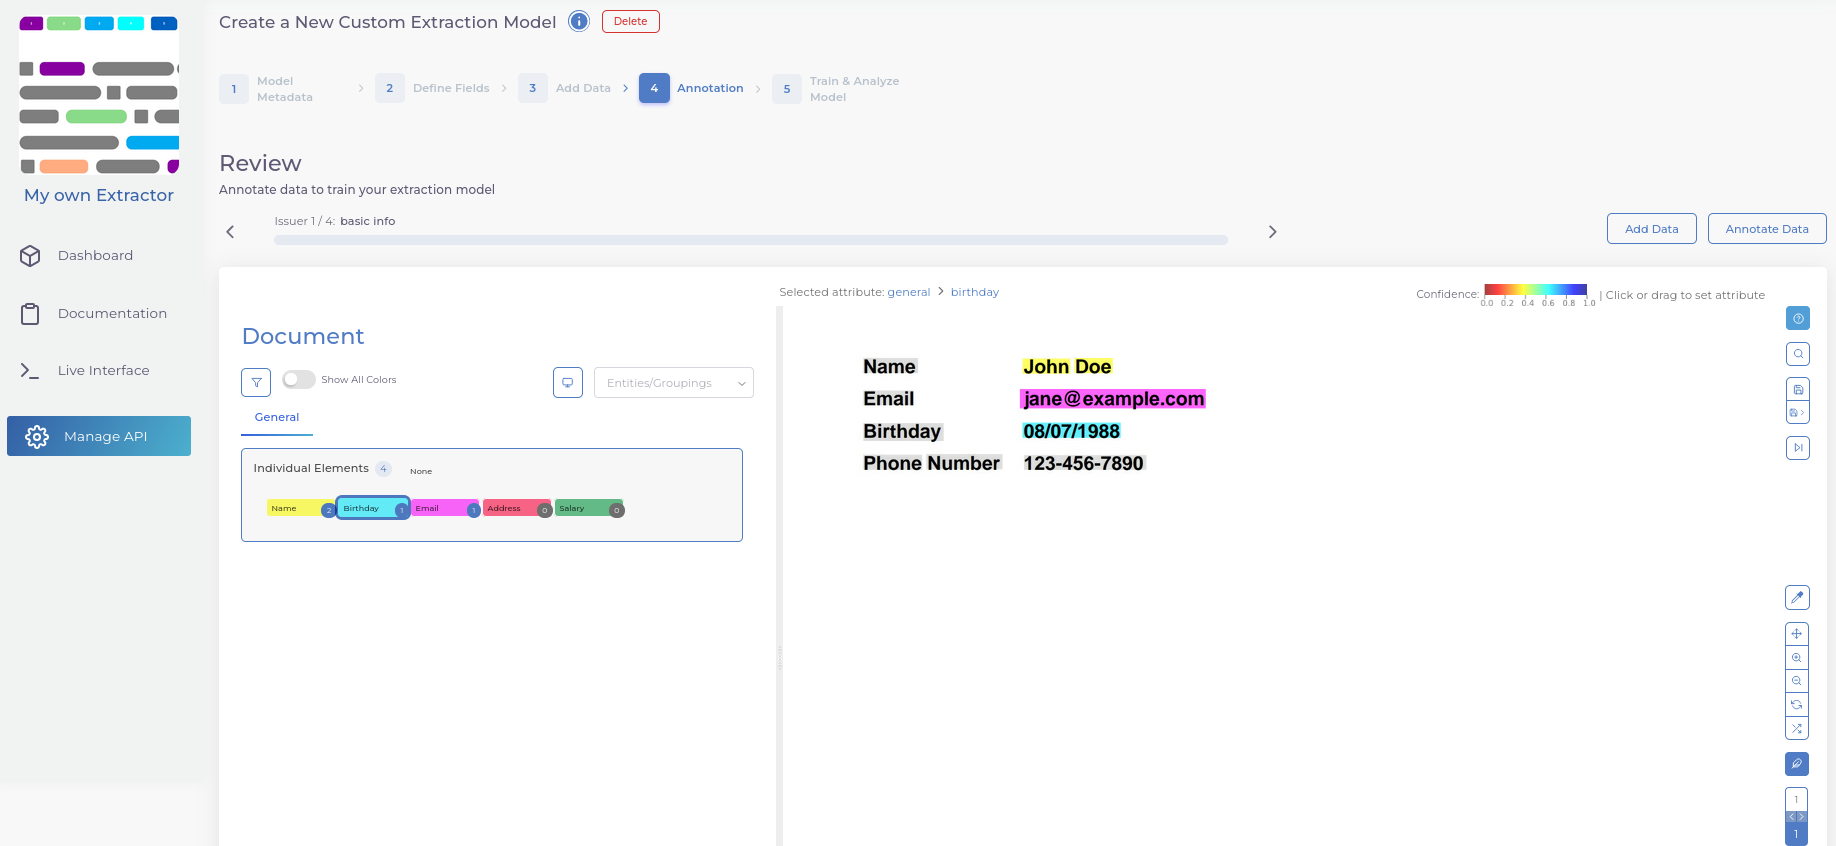
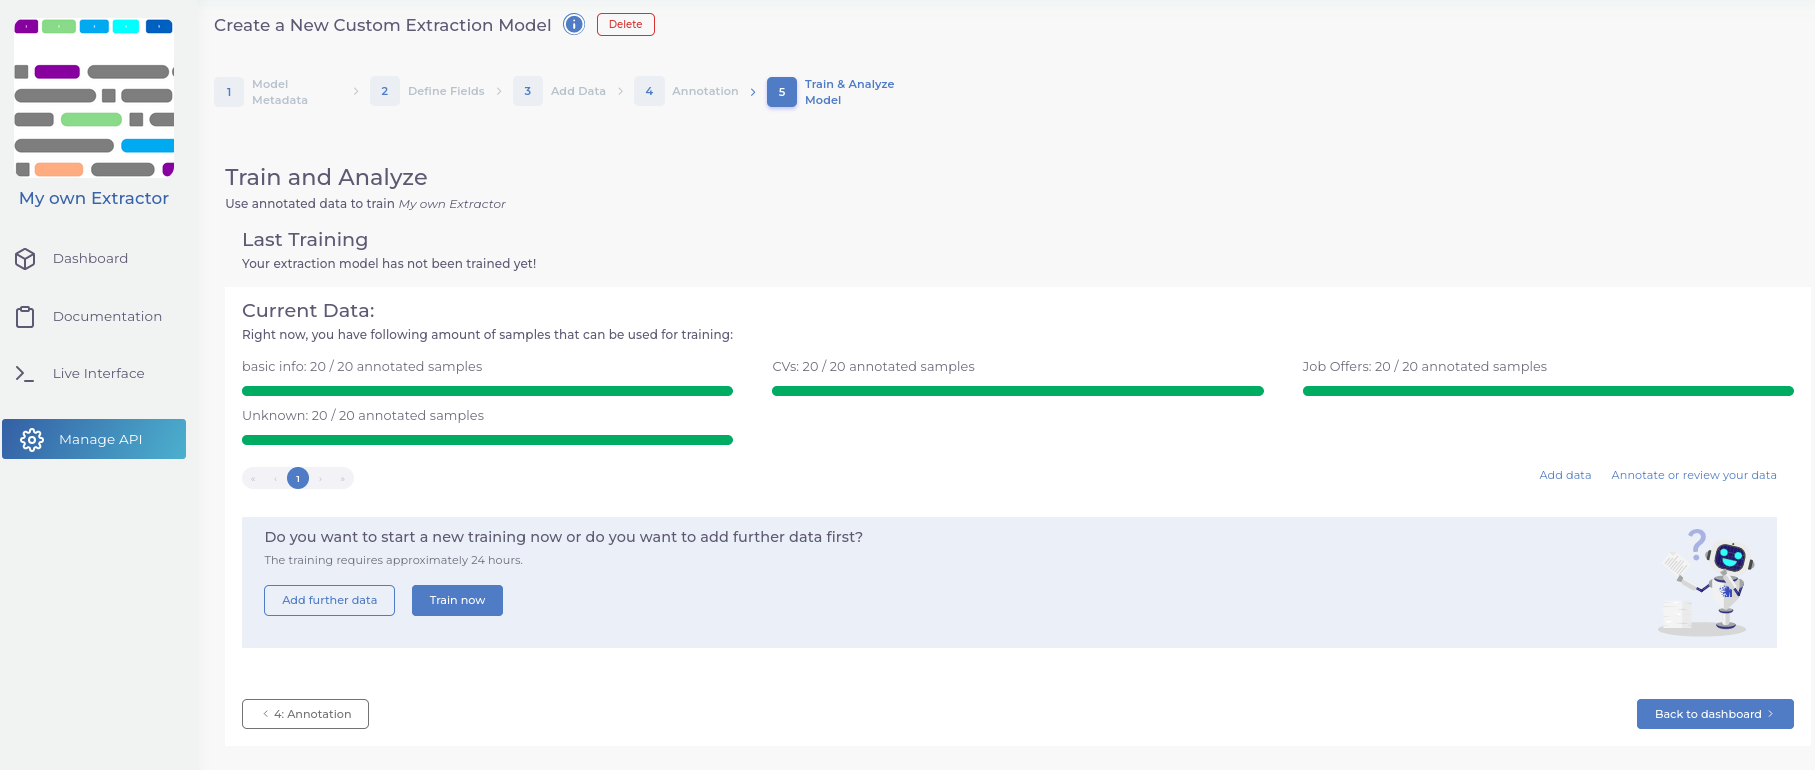
- Annotate your documents by selecting an entity on the left and assigning it to the text boxes on the right.
- Train your model and explore the per-entity analysis to see what can be improved.
You can check this blog post to see the steps in detail.
Your workflow identifier is a UUID generated during the creation process. Once training is complete you can call it like any other workflow at the processing endpoint:
Processing your documents#
You can upload documents directly from the Dashboard tab. They can also be uploaded from the Uploads tab, which lists all documents that have been processed through this workflow.
OpenAPI Documentation#
For API usage, have a look at the Documentation tab on the workflow dashboard, where you can find an OpenAPI documentation customised for your workflow — i.e. the response schema already reflects the entities you have defined.
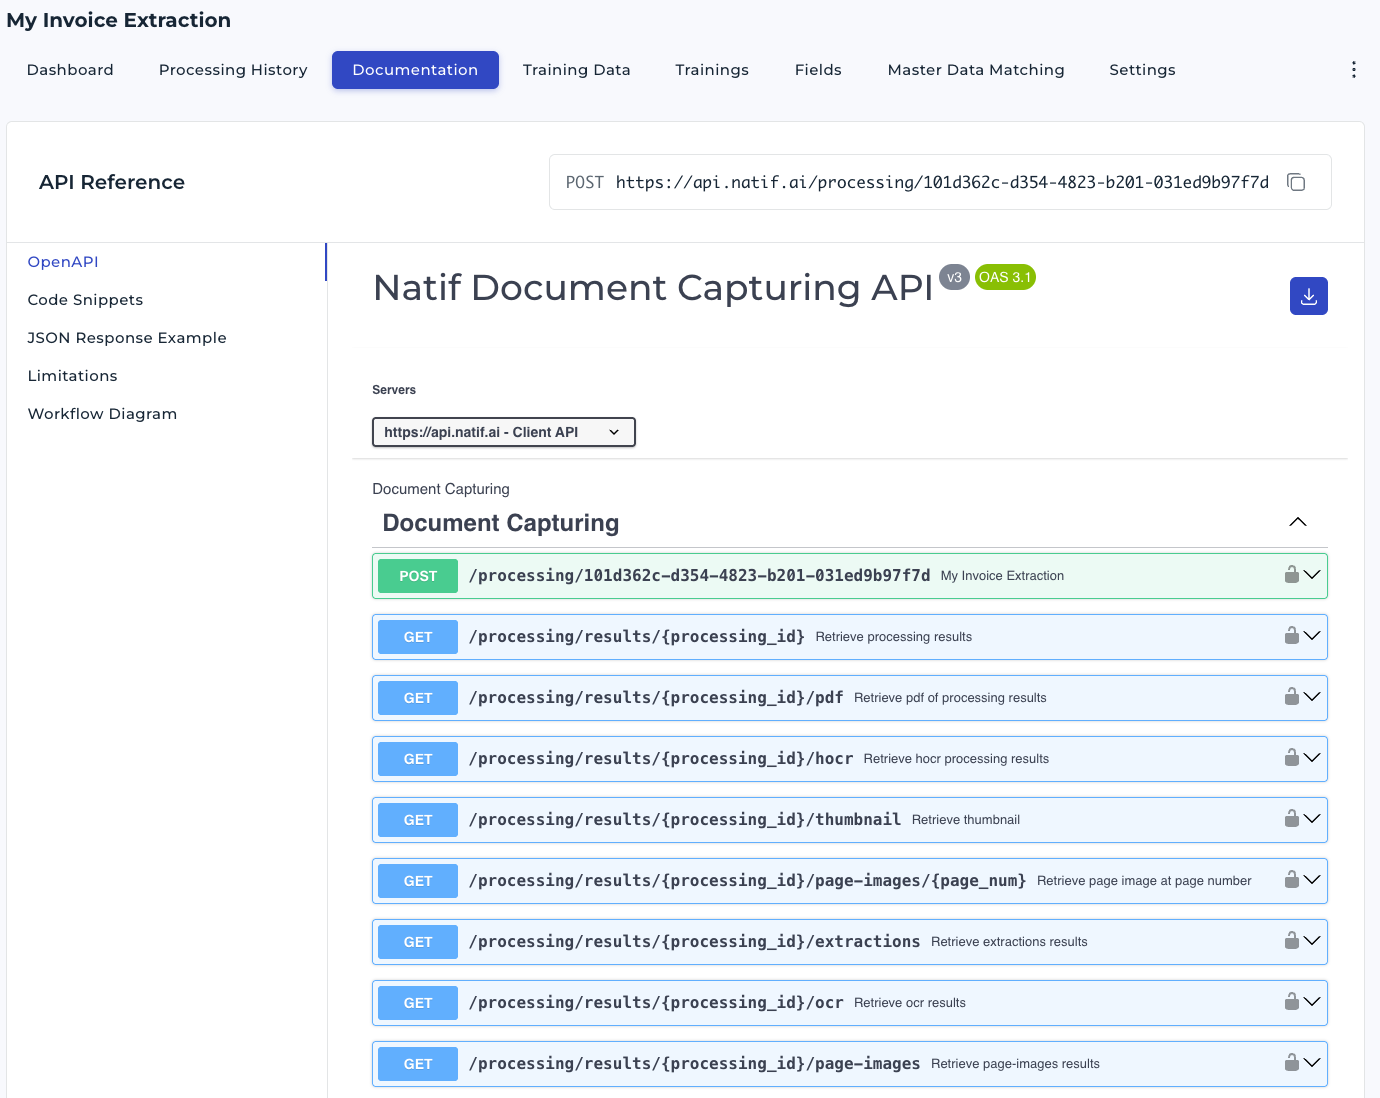
The relevant endpoint is:
POST /processing/{workflow_key}
It is used to process a document with the trained model. The workflow key is the UUID of your workflow, which you can find in the URL of the dashboard.
A typical result looks like this:
{
  "processing_id": "61726269-7472-4172-b920-62797465732e",
  "workflow_id": "56af509f-349c-45d5-9214-3c0ff4ec75e7",
  "workflow_name": "My Custom Extraction Workflow",
  "available_results": ["extractions", "ocr"],
  "extractions": {
    "invoice_number": {
      "value": "INV-2026-0042",
      "confidence": 0.97
    },
    "total_amount": {
      "value": 1234.56,
      "confidence": 0.88
    }
  },
  "ocr": { "...": "..." }
}
The extractions key contains the entities you defined for your workflow, each with a value and a
confidence score. The ocr key contains the text extracted from the document.
Note
For a reference of the structure of each of the extractions objects see
Extracted Values.
Also, for accessing individual processing results or artifacts, have a look
at Fetch Processing Results and Artifacts.
Important
The structure of extractions might contain optional paths.
See this and
this part of the documentation.
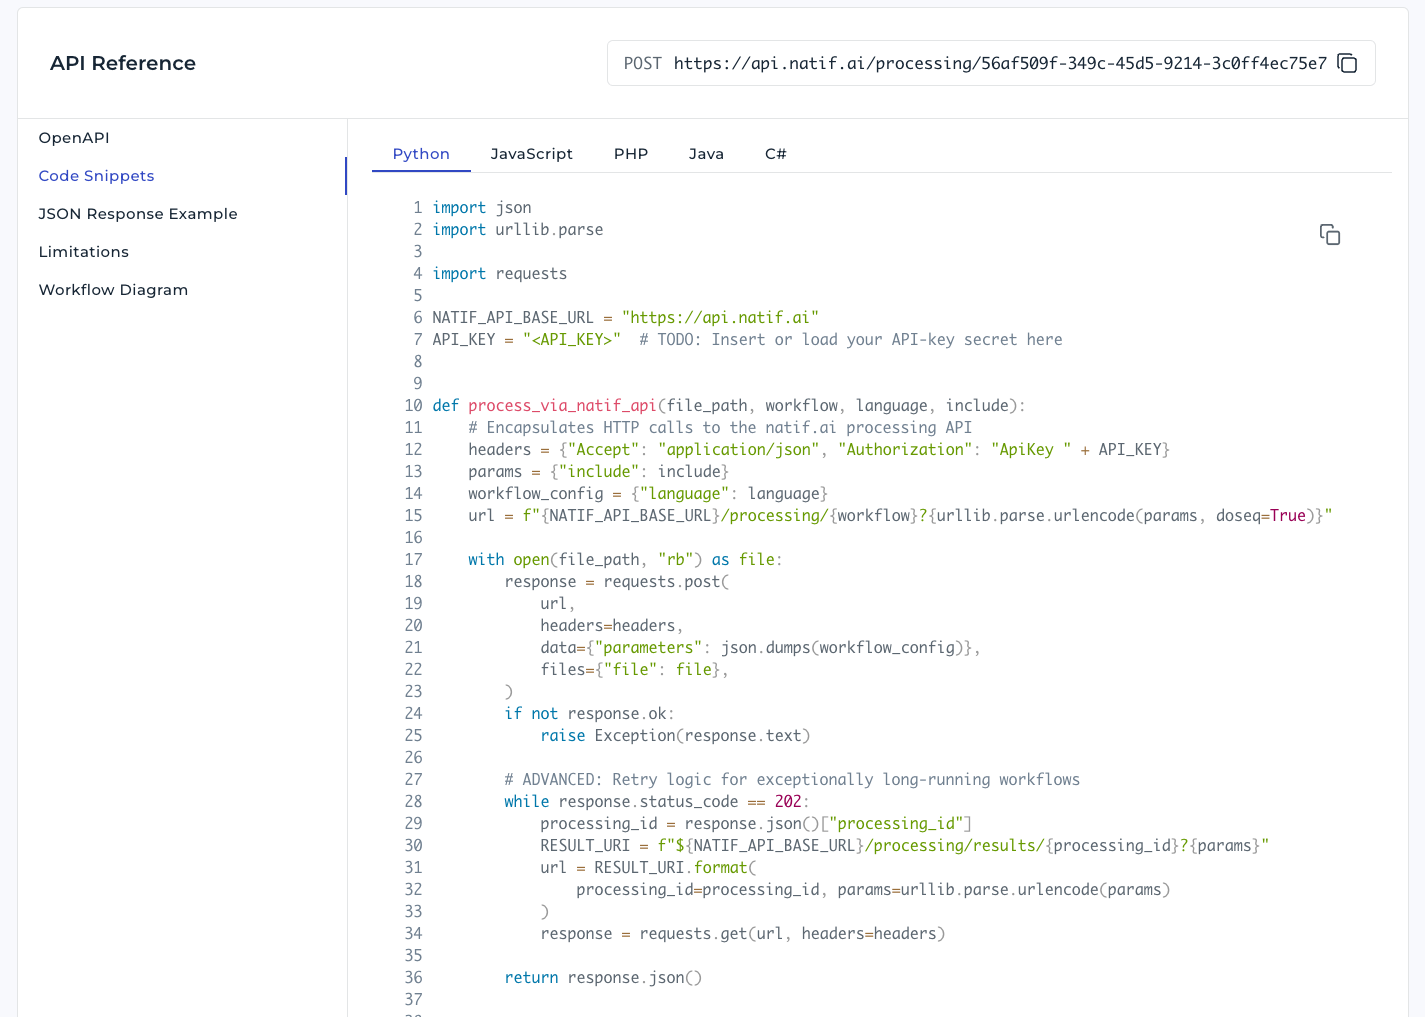
Code Snippets#
Along with the workflow-specific OpenAPI documentation, you can find code snippets for different programming languages to help you get started with the API.
Confidence and Human-in-the-loop#
Along with each extracted value, the API returns a confidence score between 0 and 1. The closer the value is to 1, the more certain the model is about the extraction. Use these confidence values to drive a Human-in-the-loop process: send high-confidence extractions straight through to your downstream system and route lower-confidence ones to a reviewer.
You can use the natif.ai Stand-Alone Interface or integrate our verification API endpoint to mark documents as verified. See Verification for details. For extraction workflows the relevant endpoint is:
Feedback#
The feedback API helps you improve your workflow iteratively by feeding processed documents back into the training data. Submit feedback on a processing result via:
You can provide a description and a tag to categorise the document under a template:
The document is then added to the Training Data view under the corresponding template, where you can annotate it and include it in the next training run.
Credit cost#
A Freemium account allows for up to 100 pages per month, where the cost is 80 credits per page, and 120 credits per document.
Note
A document is usually a bundle of 10 pages.
Previewing Workflow Updates#
natif.ai is constantly improving the model architectures and baselines for custom workflows, which sometimes requires (beneficial) updates to existing workflows. In order to not interfere with productive usage of your workflow, natif.ai will inform you in advance by email about such updates and will provide a preview version of the upcoming workflow update for you to try out before the automatic migration.
Please refer to the preview endpoint documentation to make use of the endpoint to test the upcoming version of your workflow for production usage and provide feedback to us.